
I was introduced to hover by being an info nerd with 99% Invisible. Many people still use Go Daddy because it is the industry standard and, for the most part, it is cheaper. I prefer good customer service and a simple UX, hence my hover preference. It seems there is still a small lack of resources on integrating hosting services with hover, so I’d like to put my findings here. This process was made a lot easier with help from Michael Deeb, though my explanation aims to be more visual and ELI5. This post assumes you’re familiar with Github and the git cli. If you’re not familiar, begin here.
This static blog is hosted using Github’s Pages (which only handles static sites), which is awesome because it completely free if you don’t mind your code being public. Then spend a couple of dollars your domain of choice from hover and lets begin.
For the following directions I’ll use
- Within your hover account, click your desired domain and traverse to the DNS tab.
- Delete all DNS records with a “Records” value of “A”.
- Add new records with the following values:
- Hostname: @, Record Type: A, Value: 192.30.252.153
- Hostname: @, Record Type: A, Value: 192.30.252.154
- Hostname: www, Record Type: CNAME, Value:
When complete, your screen should look something like: 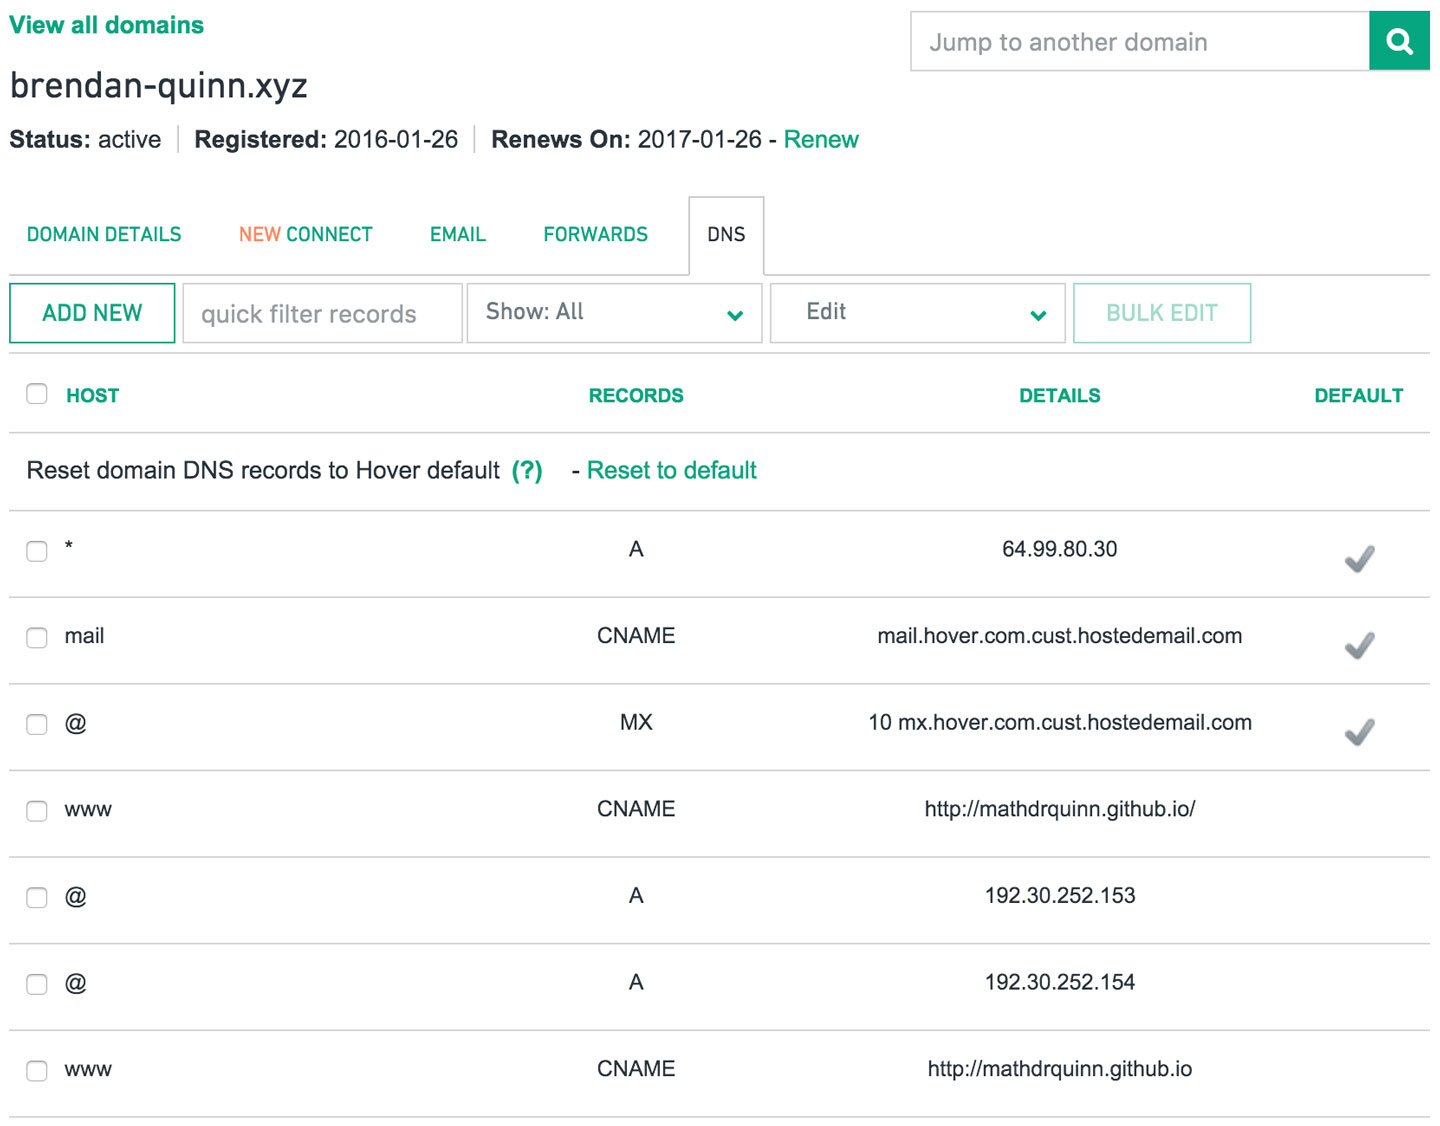
- Go to your Github repo’s root directory. To the right of the green “New pull request” button, click “New file”. Give this file the exact name “CNAME” (UPPERCASE!!) and enter
on line one with no other content and commit the file. If you prefer to use your favorite editor to create the file and then push it up, be my guest. The CNAME file should resemble this: 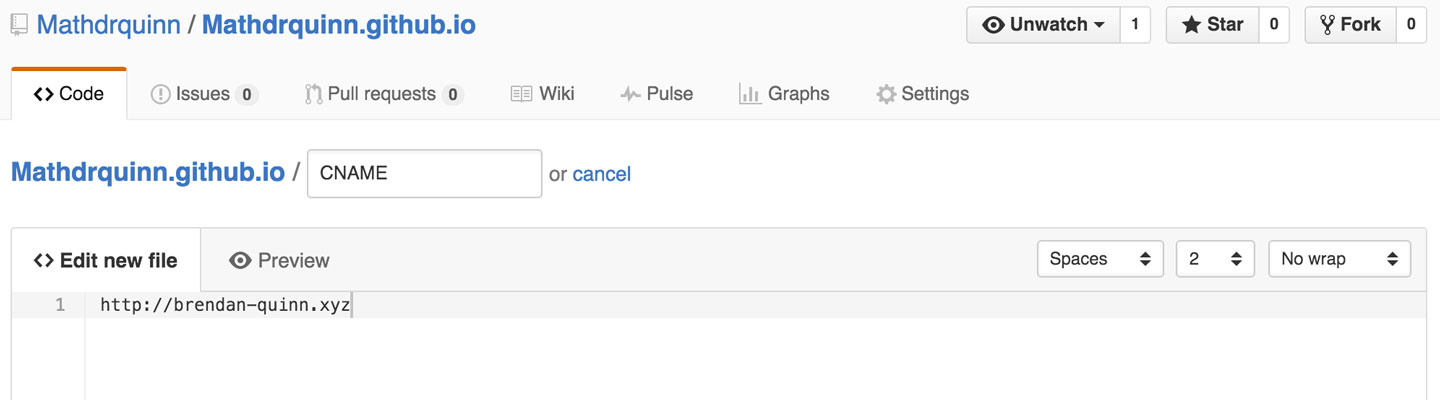
- Thats it! But be patient. The redirect can take up to 10 min to settle, although usually it happens in much less time.
All the Best,
Brendan